Trace to Scenario
Writing a scenario by hand is slow when the traffic is complex. Trace to Scenario reads a Wireshark capture (pcap or pcapng) and makes a scenario from the SIP messages of one endpoint. The endpoint is the side that SIP Inspector takes the place of: what it sent becomes a message to send, what it received becomes a message to wait for. The RTP that the endpoint sent can be written to pcap files that the scenario plays. In the GUI it is Tools/Trace to Scenario, on the command line it is -pcap2scen.
A typical use: a phone or a PBX behaves badly, you capture its traffic with Wireshark, convert the capture into a scenario of the phone, and replay it against the system under test whenever you need, with different addresses and numbers. Or the other way around: convert the capture into a scenario of the server and test a phone against it.
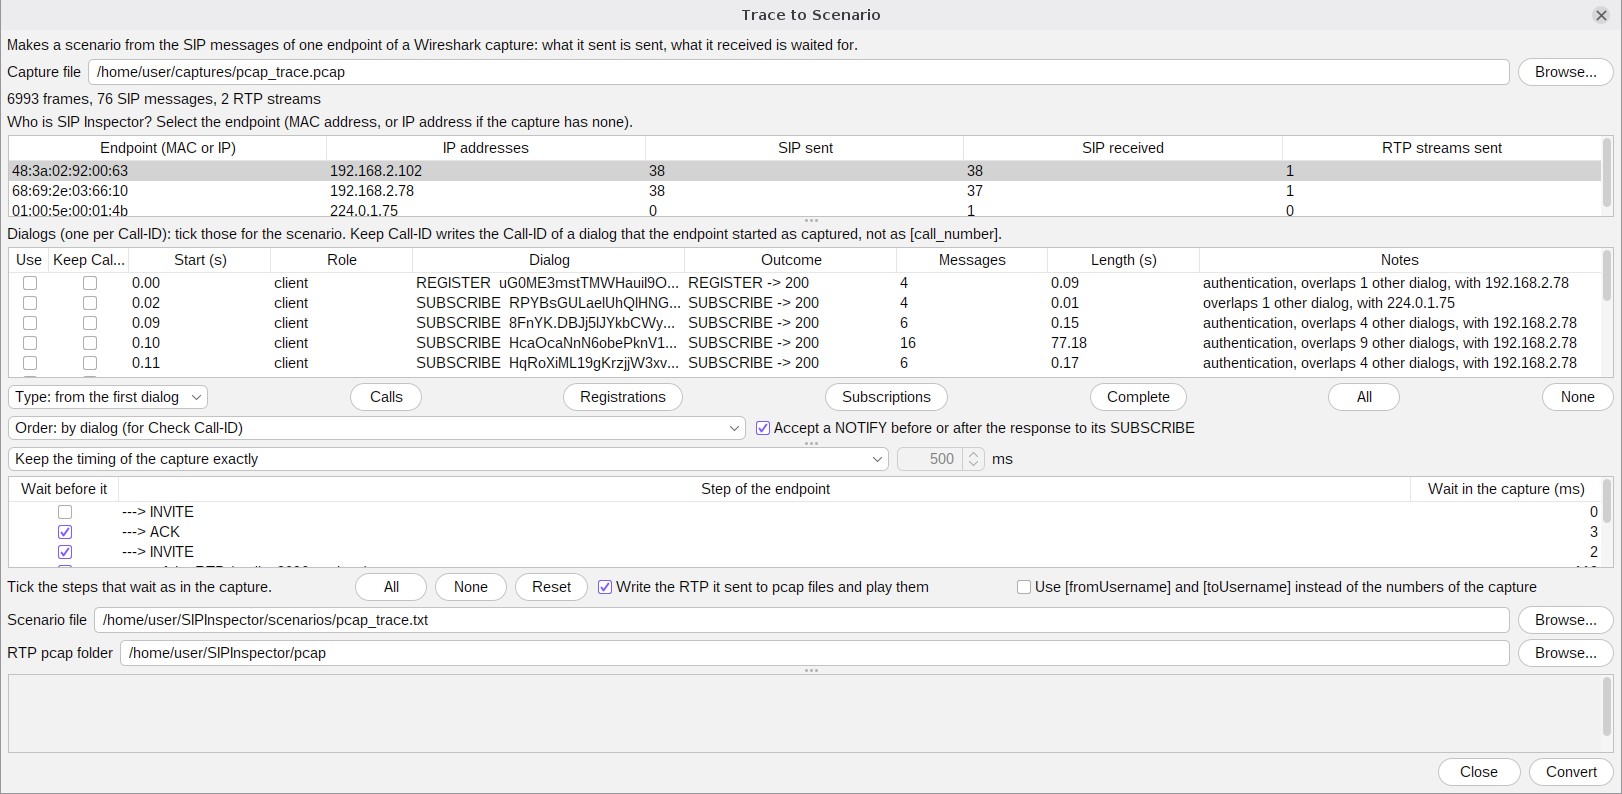
Step by step in the GUI
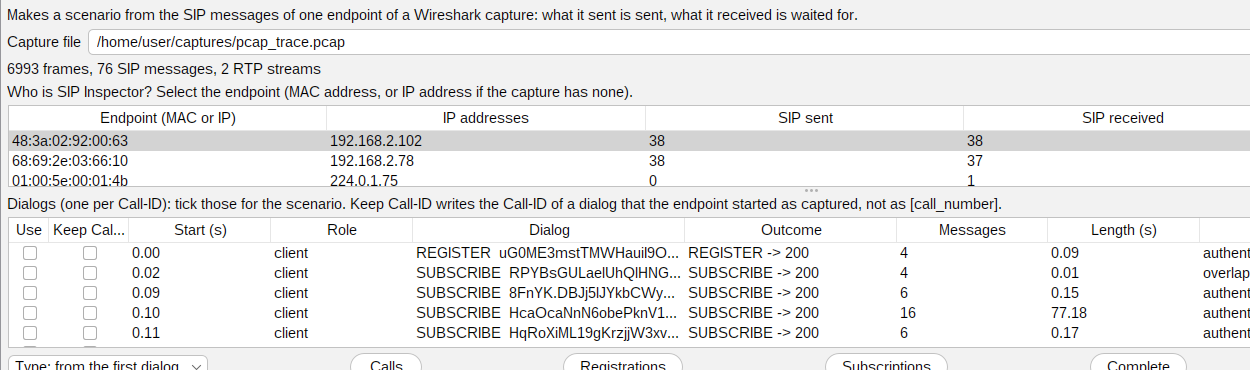
- Capture file. Press Browse... and pick a pcap, pcapng or cap file. The program reads it and prints how many frames, SIP messages and RTP streams it has. Retransmitted messages are ignored. Frames in Ethernet, VLAN-tagged, Linux cooked, IPv4 and IPv6, UDP and TCP (including messages that arrive in several TCP segments or IP fragments) are understood. SIP over TLS or WebSocket is encrypted and cannot be read.
- Who is SIP Inspector? The table lists the endpoints that take part in SIP, the most active one first: the MAC address (the IP address if the capture has no MAC addresses), the IP addresses, how many SIP messages it sent and received and how many RTP streams it sent. Select one.
- Dialogs. A dialog is all the messages with one Call-ID: a registration, a call, a subscription. The table lists the dialogs of the selected endpoint with the start time, the role (client if the endpoint sent the first message, server if it received it), the first message and the Call-ID, the outcome (for example REGISTER -> 200), the number of messages, the length in seconds, and notes (authentication, overlaps with other dialogs, the other side, a message that is cut off, a dialog that started before the capture). Tick Use for the dialogs that go into the scenario. The buttons Calls, Registrations, Subscriptions, Complete (every dialog that starts in the capture), All and None tick them quickly. The program starts with the calls ticked (or, if there are none, every dialog that starts in the capture).
- Keep Call-ID. By default the Call-ID of every dialog becomes the keyword [call_number], so every run has new Call-IDs. Tick Keep Call-ID for a dialog to write the Call-ID exactly as it was captured. The choice is made for each dialog, and only for dialogs that the endpoint started (role client). Use it when the system under test must see the original Call-ID. A scenario that keeps a Call-ID should run one call only (Total Calls = 1): a second call would repeat the same Call-ID.
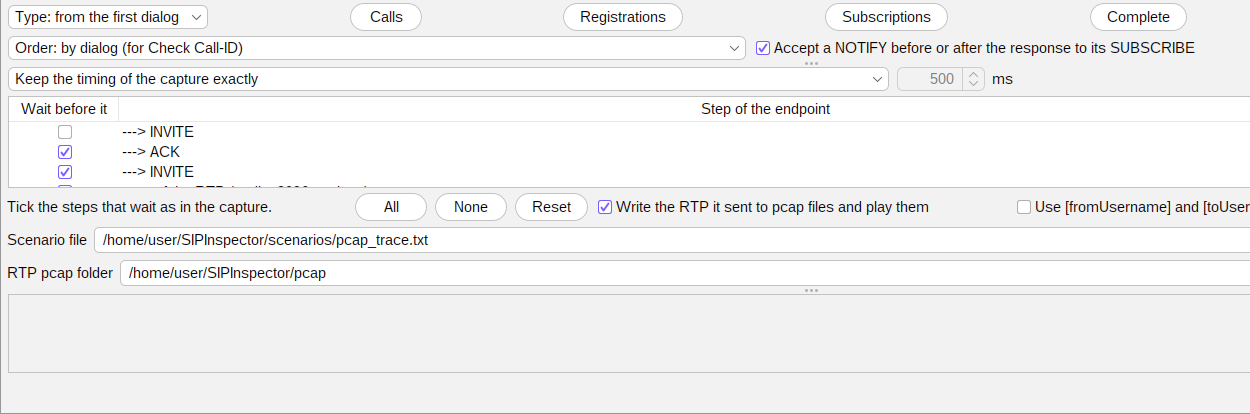
- Type. Client: the endpoint starts the dialogs. Server: the endpoint answers; each dialog starts with a message it received. From the first dialog: whichever the first ticked dialog is; ticked dialogs of the other kind are left out. A scenario cannot be both.
- Order. By dialog (for Check Call-ID): the messages of a dialog stay together and the dialogs follow each other in the order they started, every dialog a call of its own; the messages of different dialogs do not have to come in the captured order. As captured (for Don't check Call-ID): one sequence with the messages of all dialogs mixed as they were, every dialog with a Call-ID of its own; run it with Options/Don't check Call-ID, where the order is strict. Accept a NOTIFY before or after the response to its SUBSCRIBE (order by dialog only) makes the scenario take both orders, as real servers send them in either order.
- Timing. What happens with the time between the messages: Keep the timing of the capture exactly, Keep only waits of at least ... ms, or No timing: send as fast as possible. The table below lists every step of the endpoint with the wait before it in the capture; a tick means ‘wait this long’. Change single steps by hand; All, None and Reset set all of them at once or go back to what the timing mode says.
- Write the RTP ... writes the RTP that the endpoint sent into pcap files and puts a Play pcap entry for each in the scenario. Use [fromUsername] and [toUsername] ... writes the number that calls and the number that is called as keywords, so the scenario uses what is entered in the From and To of the Account section; unticked, the numbers stay as captured.
- Scenario file and RTP pcap folder say where the files go. Press Convert. The box at the bottom lists the files that were written, how many messages are sent and waited for, and warnings. Load the result with File/Load Scenario. Files that exist are replaced only after you confirm.
What the scenario looks like
Everything that belongs to one run of a call is replaced with a keyword: addresses, ports, tags, Call-ID, branch, CSeq and the media port. The scenario therefore does not depend on the capture. Headers that identify the device (User-Agent, Supported, Allow, ...) stay as captured. A comment at the top of the scenario tells where it comes from, what it does and what to keep in mind:
// Client: made from the capture pcap_trace.pcap
//
// Endpoint 48:3a:02:92:00:63 (192.168.2.102), the other side is 192.168.2.78:5060, UDP, 1 dialog
// Addresses, ports, tags, Call-ID, branch, CSeq and the media port are keywords, so the scenario does not depend on them.
// WARNING: Run SIP Inspector as a client with the remote address 192.168.2.78:5060 (or the address of the system under test).
//
// SIP Messages
//  dialog INVITE Ecxpuw6c8TmEBT.j0tnx1LGH...  INVITE -> 200
//  ---> INVITE
//  <--- 401 Unauthorized
//  ---- pause 3 ms
//  ---> ACK
//  ---> INVITE
//  <--- 100 Trying (optional)
//  <--- 180 Ringing (optional)
//  <--- 200 OK
//  ---- play call_from_trace_rtp1_audio.pcap
//  ---> ACK
//  <--- BYE
//  ---> 200 OK
Details that the program takes care of:
- Authentication. A request that answers a 401 or 407 challenge gets
Authorization: [authentication username=9040; password=[authPassword];]: the user name of the capture and the password that is set in SIP Inspector (the captured digest response cannot be reused, it belongs to the nonce of the capture). Set the password in ‘Auth password’ or with-ap. - Variables. A tag, a Call-ID or a Contact that the other side made and that the endpoint repeats later is read from the received message into a variable, not copied.
- Responses of the endpoint copy Via, From, To, Call-ID and CSeq of the request they answer (the [last_...] keywords).
- Optional messages. 100 Trying and 180 Ringing are written as optional messages, since a server may or may not send them.
- Other destinations. A message that goes to another address than the main peer (for example a multicast address) is preceded by
Set Remote. - SDP. The media port is [media_port] (or [video_port]), the address is [local_ip_sdp]; the a=rtcp lines are left out and a warning says so.
- Overlapping dialogs. A scenario runs one dialog after the other, so dialogs that overlapped in the capture are written one after the other. A warning says how many.
Playing it
Load the scenario, enter the address of the other side as the Remote Server (the scenario comment tells which address the capture had), the From and To, and the authentication password, and press Run. A scenario made with Order: as captured needs Options/Don't check Call-ID.
On the command line: -pcap2scen
-pcap2scen is a command of its own. It does not start the GUI, needs no license and does not touch the settings. It does what the window does, with options:
| Option | Meaning |
|---|---|
-ep <ip|mac> | The endpoint to make the scenario for (default: the one with the most SIP messages). |
-fs <file> | The scenario file to write (default: scenarios/<name of the capture>.txt, or ./<name>.txt when there is no scenarios folder). |
-type <t> | client, server or auto: what the first selected dialog is (default auto). |
-order <o> | dialog: the messages of a dialog together, for Check Call-ID (default); capture: one sequence in the order of the capture, for -noCID. |
-timing <t> | exact: keep every wait of the capture (default); none: no waits; <ms>: keep the waits of at least that long. |
-calls <ids> | The dialogs to take, Call-IDs (or the beginning of them) separated by commas, or all (default: the calls if there are any, else every dialog that starts in the capture). |
-noreorder | Do not accept a NOTIFY before the response to its SUBSCRIBE. |
-numbers <n> | keep: the numbers of From and To as in the capture (default); keywords: [fromUsername] and [toUsername]. |
-nortp | Do not write the RTP of the endpoint to pcap files. |
-pcapdir <dir> | The folder for the RTP pcap files (default: pcap). |
-list | Only list the endpoints and the dialogs of the endpoint, write nothing. |
-y | Replace files that exist (without it the command stops). |
-h | Print this help. |
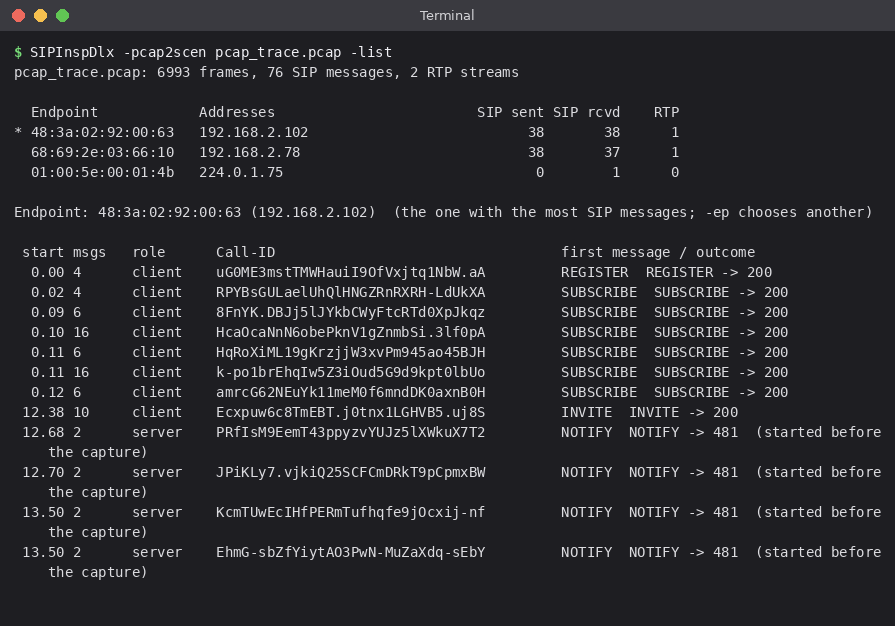
First look at what is in the capture with -list. The endpoint that has a * is the one that would be used:
Then convert. This makes a client scenario from the INVITE dialog only (the Call-ID is given by its beginning), writes the RTP that the phone sent into the folder pcap_out, and replaces the files if they exist:
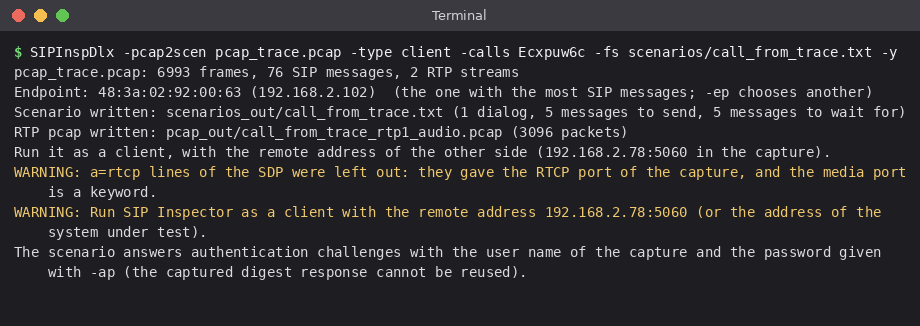
Exit codes of -pcap2scen: 0 - the scenario was written (or the list was printed); 1 - the conversion failed (no such capture, no SIP in it, a file that exists and -y was not given, a dialog that is not in the capture); 2 - the command line is wrong.